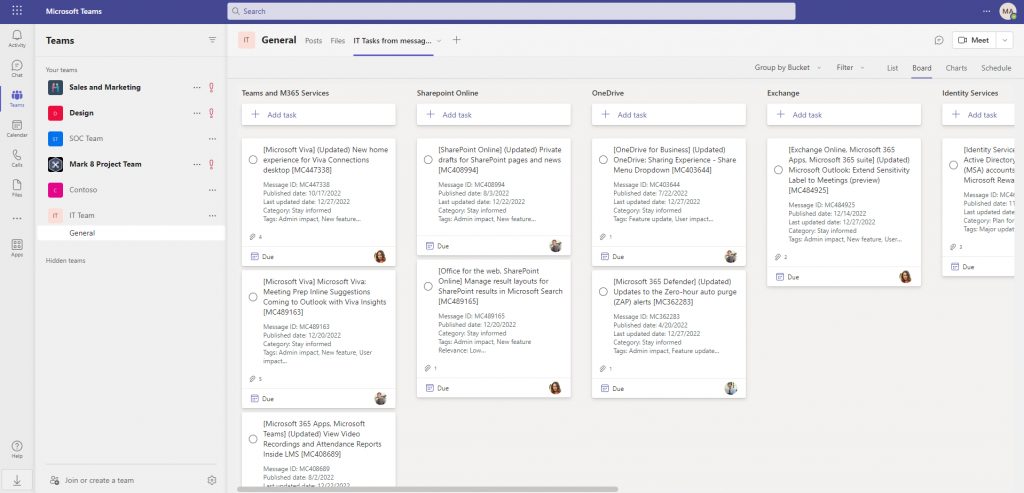
Almost daily there are new messages in the Message Center of your Microsoft 365 team and thus new tasks. In the best case, your entire IT team does not have global admin center rights, but only rights to access the necessary admin center for their area of responsibility. This also means that not everyone in your team can see the tasks in the message center. In addition, as the leader of the IT team, the question is always: How do I know which tasks and necessary adjustments have already been completed by my team?
Here is my best tip for you: Sync the tasks from your message center with a planner. Here are the necessary steps.
1. If you don’t have it yet, first create a Microsoft Teams team for your IT team and add your team as members.
2. Create a new Planner (Task from Planner and ToDo) in this team. In my example here, I have named it “IT tasks from message center“.
3. Create suitable buckets in this planner that match both the task areas from the message center and your individual task distribution of the M365 services in the team. If necessary, group the services into common buckets. In my case, I chose the buckets “Teams and M365 Services”, “SharePoint”, “OneDrive”, “Exchange”, “Identity Services”, “Windows” and others.
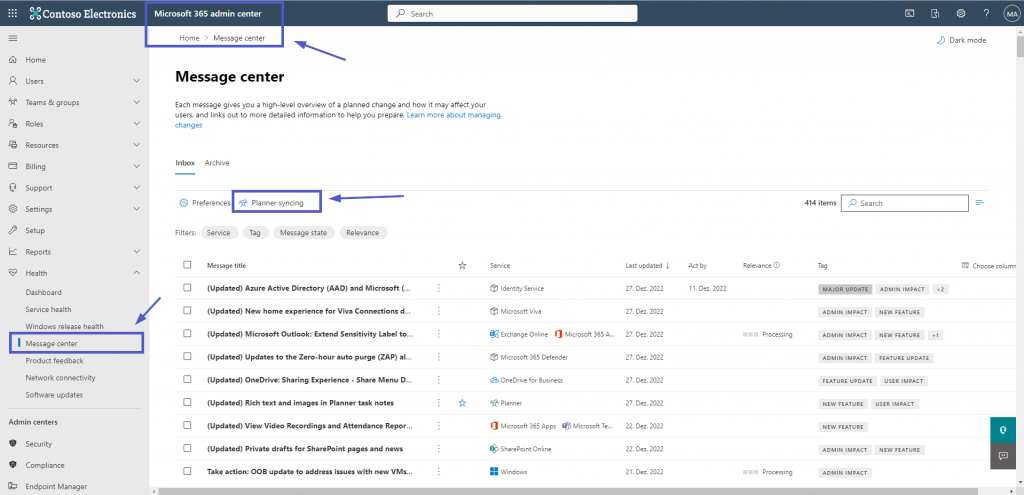
4. Go to the general M365 admin center > Health > Message center. Then, right above your messages list, select “Planner syncing”.
5. In the Planner syncing pane, select “Set up syncing”.
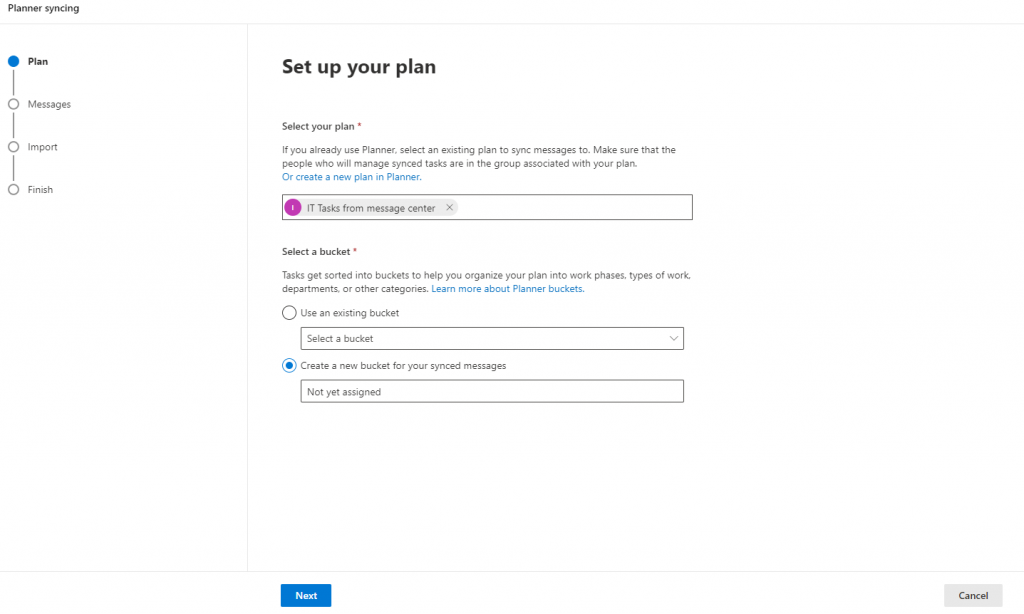
6. Under “Select your plan“, select either: Search for a plan and choose a plan from the list. (If you haven’t made the first steps, you could also create a new planner directly from here, but I recommend configuring it first.)
7. Under “Select a bucket”, create a new bucket. I named mine “Not yet assigned”. If you want to, you can also select an existing one, and then select “Next”.
8. Under “Choose which messages to sync”:
• Select either “All updates” or “Only major updates”.
• Than you have to decide which categories, products, and services you want to sync by selecting or clearing check boxes in the lists.
• Than select „Next“.
9. Under “Choose which current messages to import”, you can decide if you want to import messages from message center, which have been available for some time. You can select not to import current messages or messages from the past 7, 14, 21, or 28 days.
•Top tip: After the sync of a planner has started, you cannot subsequently sync existing tasks. To do this, the sync of a planner must be deactivated and then completely reconfigured.
10. On the Review and finish page, make sure the information is correct, and then select “Finish”.
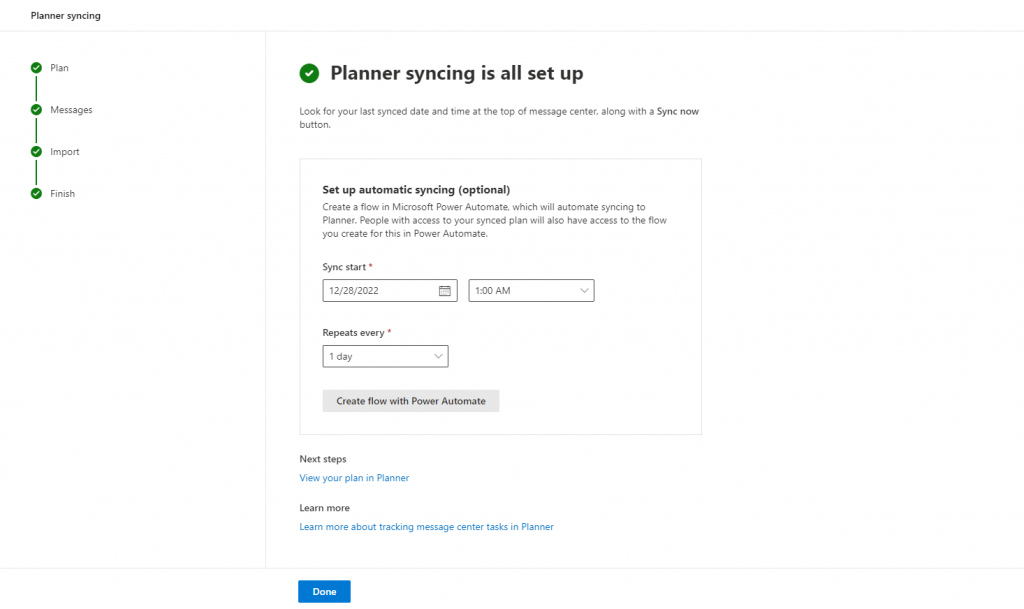
11. Finally, you need to select the interval for synchronizing the new tasks by Power Automate and select “Done”.
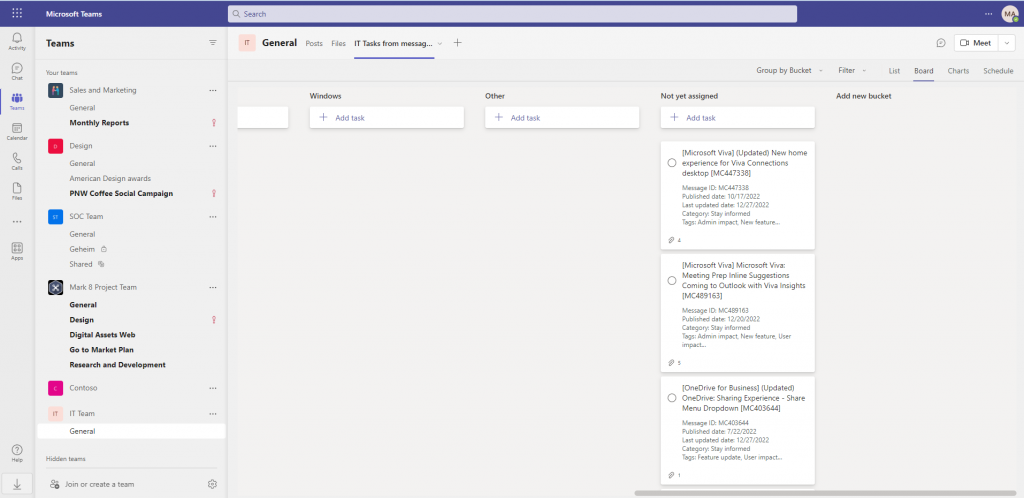
13. Go to your It Teams team and check out the synchronized tasks in the bucket “net yet assigned” an. You can now assign these to the members of the IT team and the correct buckets for the areas.
14. Once the team has completed their tasks, they can mark them as completed.
Important to know:
You can only select one bucket and one planner to sync to, but you can turn Planner syncing off and on again to change which bucket you’re syncing to.

